Outdoor lanterns add warmth, security, and character to patios, paths, and entrances. However, rain, dust, salt air, insects, and temperature changes gradually damage their finishes. Glass may become cloudy. Metal can develop corrosion around screws and joints. Solar panels may also lose efficiency beneath a thin film of dirt.
How to clean and maintain outdoor lanterns for longevity? This guide explains a practical routine based on common maintenance experience and established care recommendations. It covers cleaning methods for glass, painted metal, stainless steel, and solar components. It also highlights small inspections that prevent larger problems, such as loose seals, cracked covers, exposed wires, or trapped moisture. Always follow the lantern manufacturer’s instructions, especially when handling integrated LED units or rechargeable batteries.
Work carefully.
Before cleaning, switch off the power and allow hot bulbs to cool completely. Use a soft cloth, lukewarm water, and mild soap for most surfaces. Avoid abrasive pads, strong solvents, and high-pressure sprays. These shortcuts can remove protective coatings or force water into electrical connections. After washing, dry every joint and corner thoroughly. A soft toothbrush can reach textured frames without scratching them.
No routine is perfect. It is easy to polish the visible housing while ignoring the mounting bracket or cable entry. A monthly visual check and seasonal deep clean offer a more reliable approach. Coastal homes may need attention more often. When wiring appears damaged, stop cleaning and seek qualified electrical advice. Small details matter. Proper care preserves appearance, performance, and safe operation for many seasons.
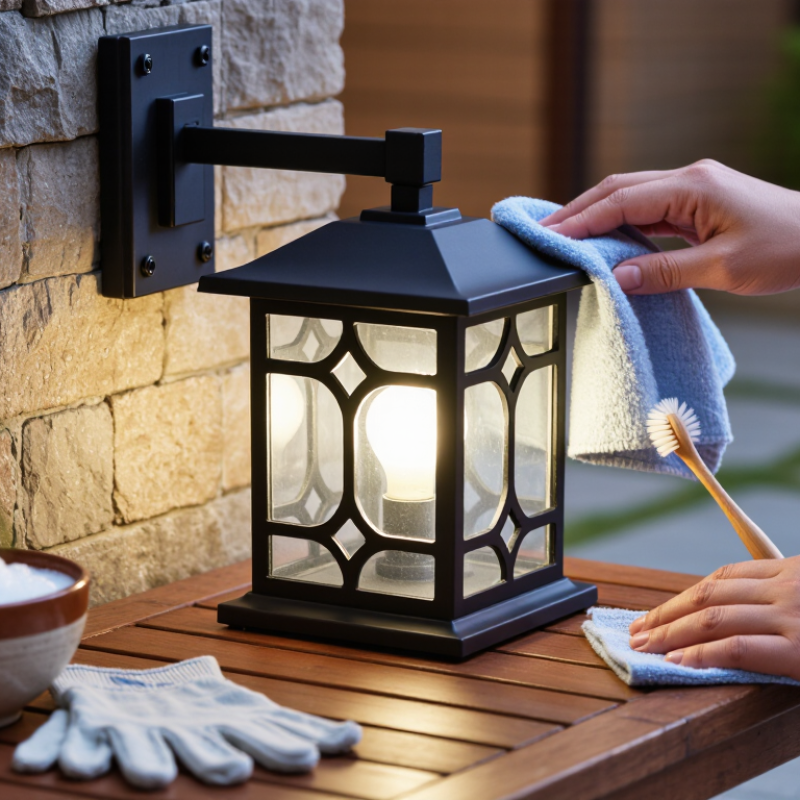
Outdoor lanterns face rain, dust, sunlight, and sudden temperature changes. Their materials determine how they should be cleaned and protected. Aluminum is lightweight, but its coating can fade or chip. Brass develops a natural patina, which some owners prefer to preserve. Stainless steel resists rust, yet salt air can still leave surface deposits. Glass shades need gentle cleaning because grit can create fine scratches. Plastic and resin are practical, but prolonged sunlight may make them brittle.
Tips: Switch off power before cleaning. Use a soft cloth, mild soap, and clean water. Avoid abrasive pads and strong solvents. Dry every seam carefully. Check rubber seals twice each year.
I have maintained lanterns where water collected behind the glass. The problem looked minor, but trapped moisture damaged the socket over time. Inspect drainage holes and never block them with paint or debris. Look for loose screws, cracked lenses, peeling finishes, and darkened wiring. Outdoor fixtures should feel secure, not merely look clean. A small amount of corrosion can spread beneath a coating. Remove surface corrosion gently, then follow the material’s approved care instructions. I sometimes clean too quickly and miss the underside. That mistake is easy to repeat. In coastal areas, rinse salt residue more often, but keep water away from exposed electrical connections. Let the lantern dry fully before restoring power.
Outdoor lantern maintenance depends on the material and its exposure to moisture, pollutants, and salt air. The chart shows practical cleaning intervals for common lantern materials under normal outdoor conditions. Lanterns in coastal or heavily polluted areas may require more frequent care.
Before cleaning an outdoor lantern, gather the right tools within reach. Use a soft microfiber cloth, a small nylon brush, and a basin of warm water. A soft toothbrush can loosen dust around screws and narrow seams. Keep cotton swabs nearby for delicate corners. For glass panels, mix mild soap with clean water. Avoid abrasive pads and harsh solvents. They can scratch surfaces or weaken protective finishes. I once used too much water around a socket, and drying took longer than expected.
Safety comes before appearance. Switch off the power and remove batteries before touching the lantern. For hardwired fixtures, have a qualified electrician isolate the circuit when needed. Let hot bulbs cool completely. Wear thin work gloves and safety glasses, especially when removing brittle glass. Inspect the ladder on firm, dry ground. Never clean during rain or when the surface is wet. Keep the basin away from electrical connections. A dry work area matters.
Place removed screws in a small container, not on the ground. Take a quick photo before disassembly if the wiring or clips seem confusing. Do not force corroded parts. Gentle movement is safer than extra strength. After cleaning, dry every component with a clean cloth and allow hidden seams to air-dry. Check for cracked seals, loose wires, rust, or cloudy glass. Replace damaged electrical parts through a qualified professional. I sometimes rush the final inspection, but that is where small problems are easiest to miss.
| Care Area | Recommended Tools and Materials | Suggested Frequency | Care Method | Key Safety Measure | Expected Benefit |
|---|---|---|---|---|---|
| Initial Inspection | Soft work gloves, flashlight, dry cloth, inspection checklist | Before each use | Check the housing, glass panels, mounting points, seals, wiring, battery compartment, and signs of corrosion or impact damage. | Do not use a lantern with cracked glass, exposed wiring, loose electrical parts, or severe structural damage. | Identifies hazards before they become equipment failures or injury risks. |
| Dust and Surface Cleaning | Microfiber cloth, soft-bristle brush, hand air blower | Every 2–4 weeks | Remove dust, pollen, cobwebs, and loose dirt from the housing, vents, frame, and decorative details. | Turn the lantern off and allow hot surfaces to cool completely before cleaning. | Maintains appearance and helps prevent blocked vents and abrasive dirt buildup. |
| Glass or Lens Cleaning | Clean water, mild dish soap, soft sponge, lint-free cloth | Monthly or when visibly dirty | Wipe the glass with diluted mild soap, rinse with a slightly damp cloth, and dry thoroughly to prevent water spots. | Avoid soaking the lantern body or allowing liquid to enter sockets, switches, vents, or control panels. | Improves light output and reduces heat retention caused by heavy dirt deposits. |
| Metal Housing Care | Soft cloth, mild soapy water, clean water, dry towel | Every 1–3 months | Clean painted or coated metal with mild soapy water, rinse lightly, and dry all surfaces, seams, and joints. | Do not use steel wool, abrasive powders, or harsh solvents that can remove protective finishes. | Helps preserve the protective coating and slows corrosion in outdoor conditions. |
| Corrosion Check | Gloves, soft nylon brush, clean cloth, suitable touch-up coating | Every 3 months | Look for bubbling paint, rust-colored marks, pitting, and corrosion around screws, hinges, seams, and drainage points. | Remove power before handling electrical fittings; replace components that are weakened or badly corroded. | Prevents minor surface corrosion from spreading into structural or electrical areas. |
| Electrical Connection Check | Voltage tester, insulated screwdriver, dry cloth, replacement fasteners | Every 6 months | Inspect accessible cords, plugs, terminals, connectors, and cable entry points for looseness, cracking, or moisture damage. | Disconnect mains power before inspection and have qualified personnel handle fixed wiring or damaged cables. | Reduces the risk of electric shock, short circuits, and intermittent operation. |
| Battery Compartment Care | Gloves, dry cotton swabs, clean cloth, fresh batteries | Every 3–6 months | Remove batteries during long storage, inspect contacts for leakage or corrosion, and clean contacts only when the compartment is dry. | Install batteries according to polarity markings and never mix old and new batteries or different battery types. | Helps prevent leakage damage and supports reliable lighting performance. |
| Vent and Drainage Cleaning | Soft brush, wooden or plastic pick, dry cloth | Every 1–2 months | Clear leaves, insects, dirt, and debris from ventilation openings and drainage paths without enlarging or damaging them. | Never insert metal tools into openings near electrical components. | Supports airflow, reduces moisture accumulation, and helps control operating temperature. |
| Seal and Gasket Inspection | Soft cloth, flashlight, compatible replacement seal if required | Every 6 months | Check seals around doors, covers, lenses, and cable entries for flattening, cracking, gaps, or hardening. | Replace damaged seals with correctly sized components; do not rely on improvised materials near heat or electricity. | Helps limit water and dust entry in outdoor environments. |
| Fastener and Mount Check | Correct-size screwdriver or wrench, gloves, replacement screws | Every 3–6 months | Check mounting screws, brackets, hinges, and frame joints; tighten loose hardware without overtightening. | Use a stable ladder when necessary and keep both hands available when climbing or working at height. | Reduces vibration, misalignment, and the risk of the lantern becoming detached. |
| Moisture Management | Dry microfiber cloth, absorbent cloth, silica gel desiccant for storage | After heavy rain or condensation | Dry exterior surfaces, inspect for internal moisture, and allow the lantern to air-dry fully before restoring power. | Do not operate an electrically powered lantern if water is visible inside or around electrical parts. | Limits corrosion, short circuits, fogging, and damage caused by trapped moisture. |
| Seasonal Deep Cleaning | Gloves, mild soap, soft brushes, microfiber cloths, clean water | Twice per year | Clean the entire exterior, remove accumulated debris, inspect all components, and record any repairs needed before the next season. | Work in a dry, well-ventilated area with the lantern disconnected, cool, and securely supported. | Extends service life by combining cleaning, inspection, and preventive maintenance. |
| Long-Term Storage | Breathable storage bag, dry cloth, protective padding, desiccant | Before extended non-use | Clean and dry the lantern, remove disposable batteries, protect glass surfaces, and store it in a cool, dry location away from direct sunlight. | Do not store fuel, batteries, or electrical lanterns near heat sources or flammable materials. | Reduces damage from moisture, temperature extremes, battery leakage, and accidental impact. |
| Professional Service Decision | Inspection record, user manual, qualified service support | When faults appear | Seek professional evaluation for repeated trips, burning smells, flickering after basic checks, exposed conductors, water inside electrical parts, or major structural damage. | Stop using the lantern immediately when a serious electrical, heat, or structural hazard is suspected. | Prevents unsafe repairs and helps restore the lantern to reliable operating condition. |
Outdoor lantern care begins with the surface. Turn off power and let every part cool. Wipe metal frames with a soft, damp cloth and mild soap. Dry them immediately, especially around joints and screw heads. Avoid abrasive pads. They can create fine scratches where moisture later settles.
Remove glass panels when the design allows it. Wash them with lukewarm water, then dry with a lint-free cloth. Never spray cleaner directly toward sockets, wiring, or control units.
The U.S. Department of Energy reports that LED lighting can use at least 75% less energy and last up to 25 times longer than incandescent lighting. Still, heat, dust, and moisture can shorten that life.
Inspect seals and drainage openings twice each year. The International Electrotechnical Commission’s IEC 60529 standard also reminds users that ingress protection depends on enclosure design, not careless cleaning. I sometimes find the smallest problem near the frame edge.
Tips: Use a soft brush for dust near vents. Check for green corrosion, loose wires, cracked glass, or darkened sockets. Replace damaged parts before restoring power. Do not scrape corrosion aggressively; that may remove protective finishes. A dry cloth is often safer than extra chemicals. During inspection, pause and look again. Dirt can hide beneath the glass rim.
After routine cleaning, inspect an outdoor lantern before reconnecting its power. Let every part dry completely, including the socket and hidden seams. Moisture trapped inside can cause flickering, corrosion, or electrical failure.
Check the glass for hairline cracks and examine the frame for loose screws. Look closely at gaskets, hinges, and drainage openings. Replace hardened seals instead of forcing them back into place. Tighten loose hardware gently; overtightening can distort the frame.
If wiring shows exposed copper, brittle insulation, or burn marks, stop using the lantern and arrange professional repair. I once overlooked a small rust spot near a mounting joint. It later spread beneath the finish. That mistake taught me to inspect edges, not only visible surfaces.
Tips:
Outdoor lanterns last longer when protection begins before storage. After each use, let the lantern cool completely. Wipe dust, moisture, and soot from the housing with a soft, dry cloth. For stubborn marks, use mild soap and water, then dry every surface carefully. Moisture hidden around seams can cause corrosion.
Inspect the glass, vents, seals, handles, and power connections before putting the lantern away. Replace damaged parts according to the manufacturer’s instructions. Remove batteries from battery-powered models, especially before long storage. Leaking batteries can damage contacts and internal circuits.
For fuel-burning lanterns, empty the fuel container only as directed and store fuel separately in an approved container. Never store a warm lantern.
Choose a cool, dry, sheltered place with steady airflow. A fabric bag can prevent scratches, but avoid sealing a damp lantern inside plastic. Add a small moisture absorber nearby, not against the lantern. Keep the unit upright and away from direct sunlight, heaters, and corrosive chemicals.
I once assumed a covered porch was safe, but seasonal humidity still reached the metal parts. That was a useful mistake.
Check stored lanterns every few months, remove dust, and test them briefly outdoors when appropriate. If corrosion returns quickly, the storage area may be too humid.
Keep a microfiber cloth, nylon brush, soft toothbrush, cotton swabs, and warm water nearby. Use mild soap for glass panels. Avoid abrasive pads and strong solvents.
Switch off the power and remove all batteries. Let hot bulbs cool completely. For hardwired fixtures, use a qualified electrician when circuit isolation is needed. Work only on firm, dry ground.
No. Do not clean during rain or when the lantern surface is wet. Keep water away from sockets and electrical connections. A dry work area matters.
Use a soft toothbrush around screws and seams. Cotton swabs can reach delicate corners. Move gently. Extra force may damage corroded parts.
Place every screw in a small container. Take a quick photo before removing confusing wires or clips. This small step can prevent a frustrating reassembly.
Wipe each component with a clean cloth. Let hidden seams air-dry fully. I sometimes rush this stage, but trapped moisture can cause corrosion.
Let it cool completely, then remove dust, moisture, and soot. Inspect the glass, vents, seals, handles, and power connections. Remove batteries before extended storage.
Choose a cool, dry, sheltered place with steady airflow. Keep the lantern upright, away from sunlight, heaters, and chemicals. Do not seal a damp lantern in plastic. A covered porch may still be too humid.
How to clean and maintain outdoor lanterns for longevity? Start by identifying the lantern’s materials, such as metal, glass, plastic, or wood, since each surface may require different care. Before cleaning, switch off and disconnect the power, allow the lantern to cool, and prepare gentle soap, soft cloths, a small brush, clean water, and suitable protective equipment. Remove dust, dirt, and cobwebs carefully, then clean the glass, frame, vents, and light components without forcing moisture into electrical areas. Avoid abrasive tools and harsh chemicals that could damage finishes or seals.
After cleaning, inspect the lantern for loose screws, rust, cracked glass, worn seals, damaged wiring, or unstable fittings. Repair or replace faulty parts safely before continued use. Dry every component completely, apply appropriate protection to exposed metal when needed, and store lanterns in a clean, dry, covered location during long periods of inactivity. Regular inspections and gentle maintenance can improve appearance, preserve performance, and extend outdoor lantern service life.

Glow Flashlight